How to Convert an RV Water Heater to Tankless?
An RV provides all the requirements you need in a standard house setting — kitchen, bedding, food storage, and most importantly, water.
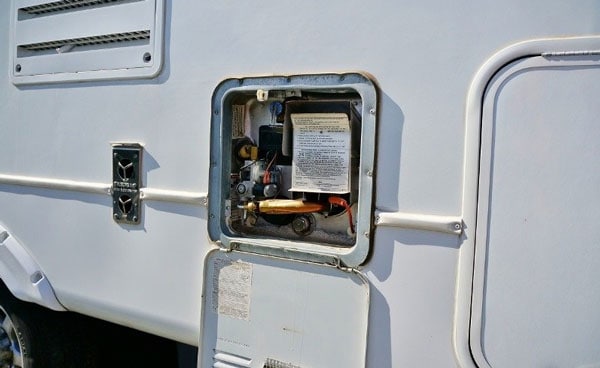
 Source: rvweb.net
Whether it’s bathing, cooking, or cleaning, water is of utmost importance. All homes include a water heater, making it just as much of a necessity for an RV.
Like a tank water heater, a tankless water heater produces hot water using electric power or propane.
The system employs a flow valve to control propane or electric heating elements to heat the water. The elements heat the cold water as it travels through the system, and the flow valve only turns the heater on when a hot water outlet opens. Then, water flows through the system.
Since tankless water heaters are on-demand devices, they only heat water when you use the hot water system. With a tankless system, there’s no depletion of hot water supply. Instead, the water heater heats water according to how much you need it.
In simpler terms, as long as there is a demand for hot water, the tankless heater will never stop producing it — there is a constant water supply.
This article will provide the necessary steps to convert your RV water heater to a tankless unit.
What are the Advantages of Having a Tankless Water Heater?
In case you’re still pondering whether or not to convert your RV water heater to a tankless water heater, here are just a few benefits to consider.
Convenience
An ordinary RV tank water heater holds up to ten gallons or less, which doesn’t mean much when you’re traveling with a family.
Fortunately, tankless water heaters deliver unlimited hot water whenever you need it. Just make sure you have electric power or propane supply and a healthy source of cold water.
Tankless water heaters are also more energy-efficient compared to their tanked counterpart.
Since they don’t have to preserve the tank water’s temperature continually, they typically use less electricity or propane. Its minimal use of gas can also cut back on fuel costs.
Tankless water heaters are also known for their longer lifespan. While a high-quality tank water heater lasts about a decade, a tankless model operates twice as long.
Steps to Convert Your Water Heater to a Tankless Water Heater
Now that we’ve briefed you on the advantages of a tankless water heater, here are the simple, easy steps to convert your water heater to a tankless heater.
1) Draining the Tank and Disconnecting Supply Lines
First, make sure to switch off the water connection and propane — this will ensure safety.
Then, you’ll want to drain the tank. Once you’ve done that, disconnect the old heater from all service supply lines. You may also need to make sure that the electrical is disconnected so that you’re not making more of a mess when you are making these significant changes.
2) Removing the Old Unit
Next, carefully clear the outside flange of any weatherproof sealant. Then, take all of the mounting fasteners out, preferably using a cordless battery drill.
When you remove all fasteners, you can use a hammer and chisel to carefully pry the mounting flange off the side of the RV.
This step may take some dedication, so be sure to take your time with this and try not to damage the RV’s flange or side.
After removing the old unit out of its recess, you may clean the area, slide the new heater into place and reconnect the service lines.
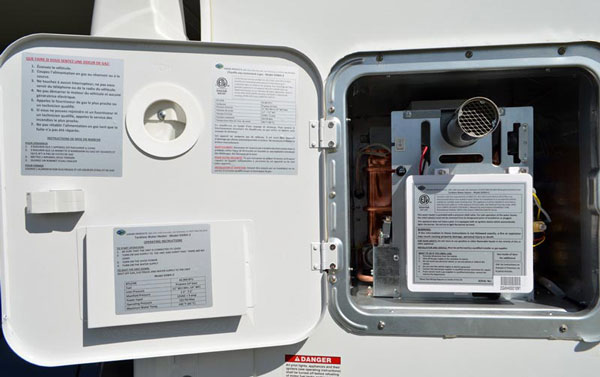
3) Installing the New Tankless Water Heater
After assembling all the necessary tools, you’re ready to install the new tankless water heater. This process is a delicate one, so don’t feel the need to rush through it. The key is to take your time and install the heater in a slow, methodical manner.
To properly slide the new heater unit into the recess, make sure it doesn’t snag or catch on anything. Then, completely seat the unit and check that it’s sitting level. Once that’s checked, you may proceed by just slightly pulling the unit out; this will help securely balance it while also providing enough room to seal the flange.
Place the unit in the hole carefully and position the door and seal it. Take time to check if the new tankless unit’s mounting holes line up to the old unit’s holes; if necessary, you can drill new holes.
Now, you may install a couple of mounting screws, but don’t torque them up yet.
You’re now ready to make the internal connections and hook up the new heater to the service lines.
4) Reconnecting to Service Lines
If you’ve set up your new tankless water heater correctly up to this point, reconnecting should be a breeze.
First, make sure you connect the appropriate water lines to the correct points on the heater. Then, be aware not to cross-thread any of the fittings.
Lastly, don’t over-torque any of the fittings — you don’t want to break the fittings off the heater accidentally. Instead, use a second wrench to hold the tank fitting while you secure the hose fitting. Double-checking your propane line is securely connected.
Now you can tightly screw and secure all the screws into place on the outside flange. A helpful tip is to apply a bead of silicone to ensure the heater is moisture-free from the outside.
When the unit is secure, you can attach any vent fittings and place the door on the heater. You can now add the hot and cold water connections to the unit.
Now you’re set! All that’s left is to turn the hot water on, examine the water flow, and adjust the temperature to your liking.
 Source: wikiocean.org
RV Tankless Water Heater Maintenance Tips
Now that you’ve correctly converted your RV water heater to a tankless unit, you may want to consider some maintenance tips.
Thankfully, your tankless water heater system doesn’t require much maintenance. However, you should still hire a professional to service your unit and inspect electric or gas elements regularly.
Bottom Line – Do you need a plumber for this?
While converting your RV water heater to tankless may seem daunting, we hope our explanation and a step-by-step process on how to install a tankless unit has made the process simpler.
Even though the DIY installation process is relatively simple, it never hurts to ask for help. If you still have questions or concerns on how to install your tankless unit, don’t hesitate to reach out to a plumber for professional evaluation and advice.
