Uncut Tiny House Preview
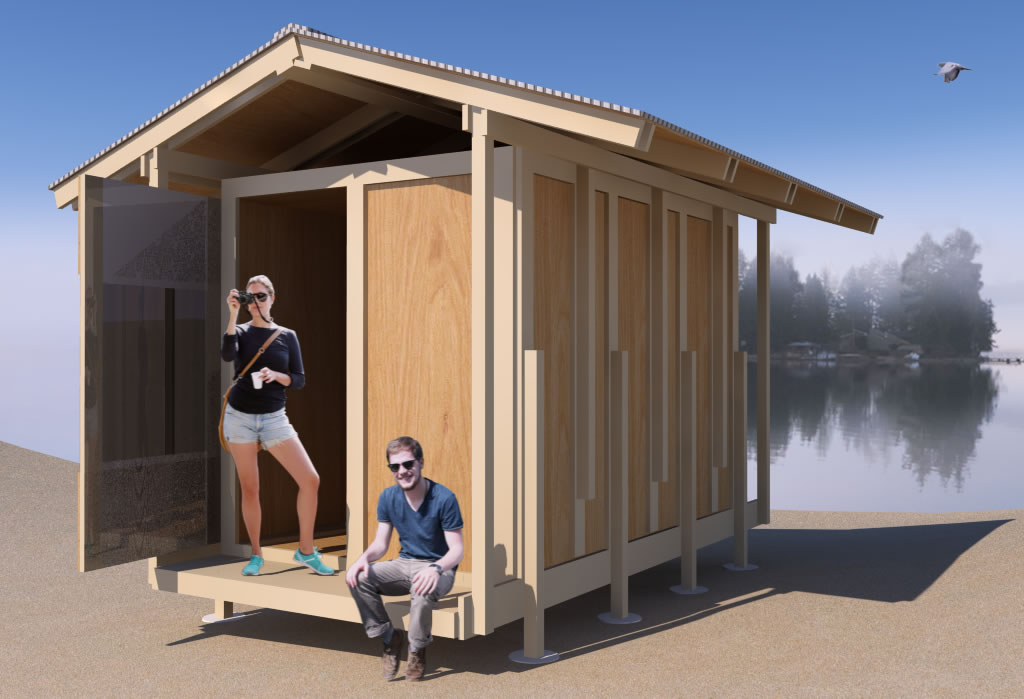
The other day someone commented on Facebook and challenged tiny house designers to design houses with fewer angled cuts. They had spent the day cutting angles on their own tiny house.
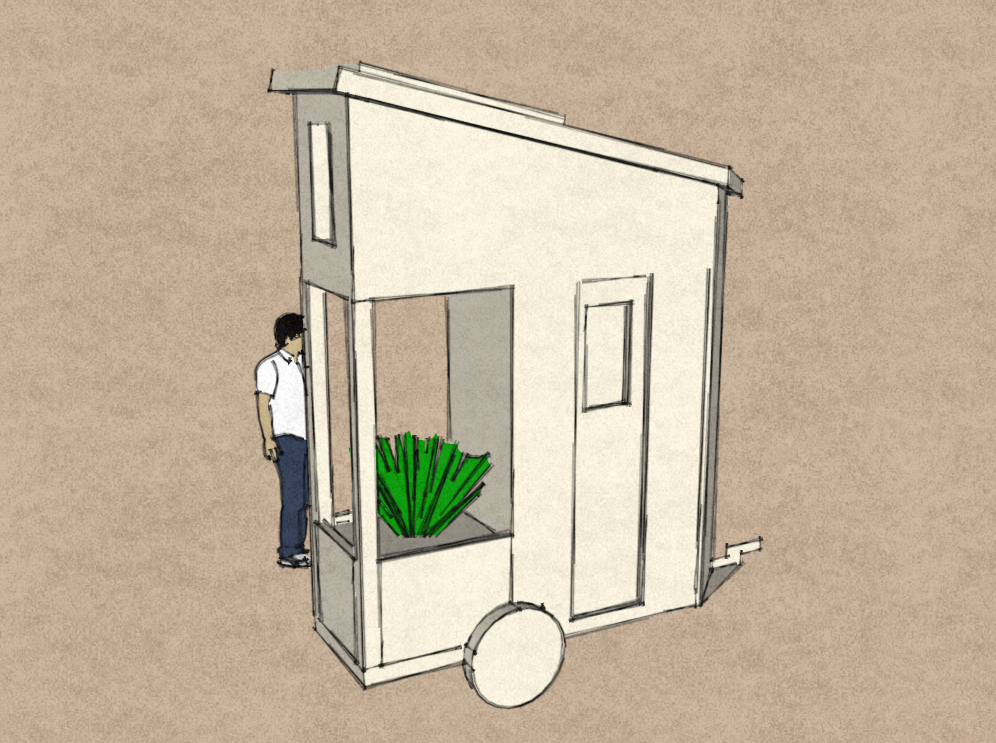
Since so many tiny homes are owner-built fewer cuts would make construction faster and easier. I found the idea was so compelling, I decided to attempt a tiny house design that required the builder to make no cuts – use no saws. In other words, a house design that just used material right off the store shelves.
This is what I came up with; it’s only conceptual – I’ve not tried to build it. The tools you’d need are: a drill & bits, hammer, utility knife, level, measuring tape, ladder, and shovel (or post hole digger). In addition to the wood you’d need some building adhesive, foam insulation panels, nails & screws, lag bolts, plexiglass, hinges, door latch, metal roofing, roofing felt, flat roof membrane, wood finish.
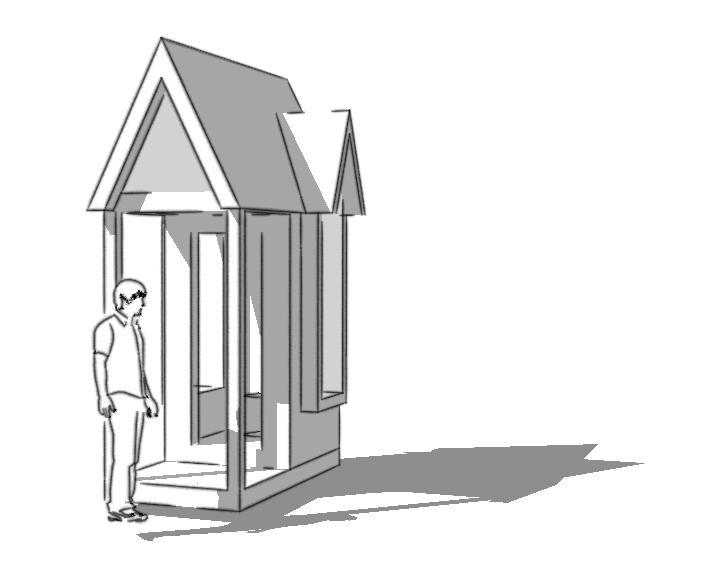
The plans for this concept will be available in the next few days. Below are the step-by-step assemble illustrations.

This is intriguing, even if it’s just a proof of concept. I’m guessing this is going to be one of your free plans. I hope so.
This is a great idea. I’ve been thinking about building a tiny house, but the power saw is a scary thing to an amateur.
Don’t be intimidated by power tools! I took a summer construction class through my local community college and now I feel confident in using them, so much so that I just built two simple garden projects (obelisks) and repaired my back porch railing! 🙂
Power tools are great, I agree. They really speed the process. I took on this design challenge to show how one could avoid them if needed or desired… not really to help support phobias.
I’m also no safety sam, he’s a video of how I dangerously use a reciprocating saw to bust up a pallet. http://www.youtube.com/watch?v=1fbNVqK7ifo
It should be noted that Home Depot offers precut plywood in 4’x4′ and 2’x4′ as well, so more window options are possible.
Thanks, good thinking.
I’ve not posted details on the door/window combo, but it’s made from 2 8′ 2x6s, 2 2’x4′ plywood pieces on the exterior plus 2 2’x4′ plexiglass pieces and 4 2’x4′ pieces on plexiglass (if a 4’x8′ is not available) on the inside. There’s also a foam board core.
I once found a little bird house kit that slotted into tabs…a fathers worst nightmare on Christmas Eve…with little pieces of wood to lock them into place. Almost like cotter pins. That would be kin to this one, right? A very distant cousin. This reminds me of what would happen if an erector set and a lincoln log had a kid!! Very cool!!
Cool! What about the ceiling joists (or whatever they’re called? Sorry, I don’t know much carpenter-speak.) Aren’t they cut at an angle? I look forward to the plans!
Michael, do you use ready-made SIPs, or glue them together yourself?
In the warmer areas one can go with a shed roof, using uncut 2x10s as studs on the high side, and mosquito netting tp “close” the short-side triangles & the long side at the top. Good ventilation! Screw the ceiling to the bottom of the rafters. And use purlins instead of sheeting under the tin roof.
Even windows should be possible with the right choice of ready-cut 2’x4′ and 4’x4′ sheets if one can make one’s own SIPs.
I was planning on making the SIP panels up myself and modeling them after framed walls with 2x4s places inside for strength and fastening. I know that’s overkill but since I’m not an engineer – nor expect any owner-builder to be – I want to show something that would theoretically be just as strong or stronger than a standard framed structure.
How were you planning to do that? I understand those panels are foamed under pressure to create the strength , sort of like prestressed concrete. Can you fill us in on your approach?
Love it! And love how these projects are becoming more accessible to those with less construction knowledge and strength : )
This is a wonderfully simple solution that is scaleable as well. Thanks for posting. I have a lego type system of precut pieces that are interlocked with steel C channel keys. The finished system is covered with a specialized ceramic stucco both interior and exterior that makes it impervious to the elements and stronger than concrete. Minimal tools, minimal skills, are required. All very light weight but the result is a super insulated structure.
[email protected]
Michael, you’ve reinvented the pole barn. Ok for a shed but not a house.
If someone is mot willing to cut angles to build their own, they shouldn’t start. If you want Lego, look at timber framing or T&G milled logs.
It brings to mind a photo I spotted in Wood’s book RVs 1900 to 2000. It had a person in a vehicle moving cross country with the house on a trailer on the tow hitch….to be assembled when you got there. And wasn’t there another one that assembled it when they got there? Or was it assembled wall by wall, with one per weekend being towed up to the land?
Do you think that the roof would support much load? With the overlapping rafters and lack of a ridge beam, it looks to me like it would want to collapse under any significant load.
I’m working on version 2 right now and will actually fix that potential issue.
Roof loading: what about a shed-roof? 8-ft high on one long wall, 10-ft on the opposite side. A nice 1-in-4 slope, and even with just 2×4 rafters little chance of collapse. A 1×4 top plate is strong enough over a wall-length of 12 ft.
I would suggest just 1 door, and that in the middle of one of the long walls (much less waste of internal space).
This uncut version is definitely possible, with judicious use of standar lumber. I played around a bit on paper with SIPs. Floor: 1.5″ Styrofoam between 3/4″ floor and 1/4″ plywood. Walls of 3/4″ Styrofoam between 1/2″ inside and 1/4″ plywood is strong enough and the thickness of a standard 2x. The framing of door and window(s) provides extra strength were needed. It’s possible to retain an exact internal floor space of 96″x144″, so uncut lumber can also be used for internal construction. Michael, I’ve let the end-pieces of the lumber in the SIPs provide a lip for the corners (no need for covering 1x4s). This does mean spacers need to be used in each corner (a few pieces of 1/2″ dowel suffice). Or one could run cables in that space… 🙂
I cannot figure out a way to make do with uncut lumber for windows.
Since I live in the tropics any such design would incorporate a lot of natural ventilation and options for rainwater collection — and lots of overhang for shade. And I’d paint the heck out of all edges (at least 3 coats) before final assembly.
A very nice project as exercise of the mind! Keep going, Michael! Any way I can pass my exercises to you, for whatever they’re worth for your design?
Though I like the idea, the only immediate problem I see is the way the roof sheathing is not staggered. If you were averse to cutting, you could have the plywood cut at the store so you’d have a less vulnerable roof design.
There are several compromises like that. In the next design challenge – The No Waste Tiny House – I’ll show how a house could be built correctly with few cuts and no wasted lumber.
Are the plans finished yet for this tiny house?