RV Refrigerator Not Cooling But Freezer Is (Causes and Fix)
Have you ever opened your RV refrigerator to find the contents inside, but found that your freezer compartment is working just fine? Fear not – we’ll give you the full run-down on this common issue, and the steps to take to resolve the issue of when your RV refrigerator not cooling but the freezer is.
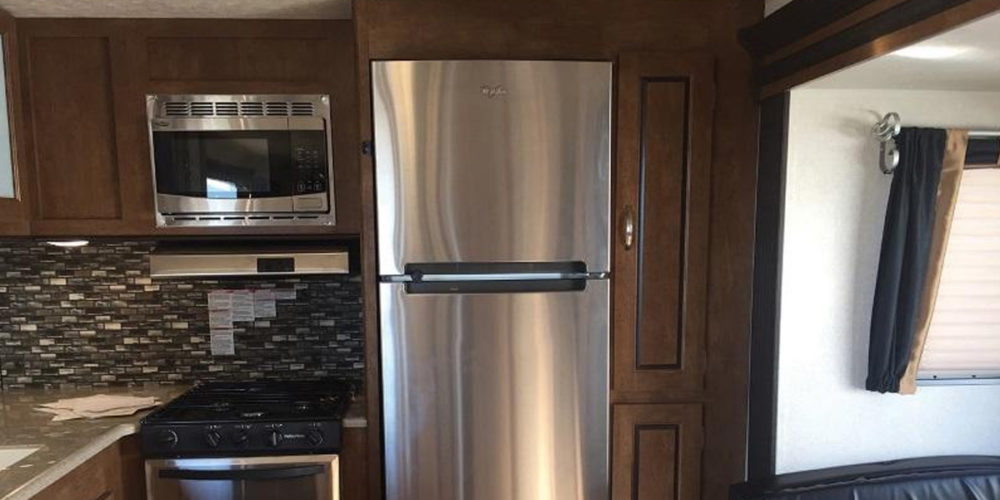
Understanding How An RV Refrigerator Works
The coolant is distributed to the freezer first before its migration to the refrigerator – this is the fundamental RV refrigerator mechanism.
Typically, RV refrigerators have three different power sources available to them: electricity (AC Power), propane, and batteries. The most common heating element is either electricity or propane.
The heat is first generated from these sources and triggers a process called absorption. Next, an alchemic mix of ammonia, water, and hydrogen combine to draw heat away from the inside of the refrigerator through evaporation.
Finally, the condensation within the tubing surrounding the refrigerator creates a cooling effect.
Contents
- 1 Understanding How An RV Refrigerator Works
- 2 How to Tell if RV Fridge is Working
- 3 How Cold Should a Camper Refrigerator Be?
- 4 Why Does My Camper Freezer Work but not the Refrigerator?
- 5 Why Your RV Fridge is not Working on Gas or Electric
- 6 RV Refrigerator Works on Electric but not Gas
- 7 RV Refrigerator Works On Gas But Not Electric
- 8 How to Fix An RV Fridge If It’s Not Cooling
- 9 How to Replace Cooling Unit in RV Refrigerator
How to Tell if RV Fridge is Working
The burner is operating correctly
If not maintained properly, gas burners can become contaminated with dirt and soot, causing poor ignition and deflagration.
There is no buildup of ammonia sediment
A sure-fire way of knowing there’s a serious problem with your RV refrigerator is if you can smell a pungent ammonia odor in your RV; especially if you also detect yellow residue or powder in and around the coolant unit or the burner.
Sadly, this is often a critical RV refrigerator failure – a complete replacement is usually the only option left.
The defuser is not clogged with ice
The diffuser is the vital conduit that provides cool air circulation from the freezer to the refrigerator. This is prone to ice blockages.
It works on both electric and gas mode
It’s important to always have a backup – ensure you have at least 2 power sources available to you for your RV refrigerator, and make sure they’re both working.
The temperature is low enough
That the temperature sensor and refrigerator thermometer must be working efficiently and correctly to ensure that they’re giving the correct readings in the management of your fridge’s cooling capacity.
How Cold Should a Camper Refrigerator Be?
Ideally, your RV refrigerator should be consistently measuring around 34°F and your freezer around 0°F.
Why Does My Camper Freezer Work but not the Refrigerator?
There is a multitude of factors that can make the freezer work but not the refrigerator. It could be due to blocked airflow, low gas pressure, or a whole host of other issues. Below we will delve into the main factors you need to be aware of.
Why Your RV Fridge is not Working on Gas or Electric
Blocked airflow
Overheating can have a major effect on an RV refrigerator’s cooling capacity. Dust and other impurities can affect the vent cover. It can also affect the upper refrigerator vent’s air circulation, which requires maximum airflow at all times.
Blocked exhaust
It’s often the case that an immense build-up of hot air can occur in the system due to a blocked refrigerator exhaust, preventing hot air from escaping. This should also be top of the list of areas to inspect for blockages when overheating occurs.
Thermistor issues
The thermistor manages the rate of cooling of your RV refrigerator and ensures a constant, stable temperature is maintained – a sophisticated process known as the negative temperature coefficient. If this device fails, the unit may begin to display erratic cooling cycles.
The tank valve is off
When traveling, it’s advised to turn off your propane tank as a safety precaution. It’s also best safety practice to turn off the RV refrigerator when refilling your propane tank. When your vehicle is stationary, make sure that the propane tank valve is back on.
RV Refrigerator Works on Electric but not Gas
Low gas pressure
Pressure changes can cause instability with the cooling performance of your RV refrigerator, with either over-cooling or under-cooling being the common problems. A high-quality gas regulator is recommended to ensure consistent and stable gas flow.
Blocked burner jet or nozzle
The gas burner or nozzle can often become blocked with soot. The ideal method of cleaning these components is to use pressurized air; just be careful not to have the pressure too high, as this can damage the burner.
Blocked gas flue
Unblocking is best achieved by removing the burner first to get full access to the flue, and using pressured air and a pipe brush to clean away the soot.
RV Refrigerator Works On Gas But Not Electric
Low voltage
A heavy electrical load can be caused when too many appliances are left on at once. This can reduce the voltage flowing to your RV refrigerator, often resulting in the RV refrigerator not cooling while the freezer remains functional.
The heating element is not hot enough
If the voltage readings are correct and it’s not heating properly, then it’s time for a replacement – take great care when handling this component to ensure you don’t burn yourself!
Plug not connected
An obvious one, but always worth a check! It’s also worth making sure all the switches on your main circuit board are fully working and that all the plug sockets in the RV are receiving power.
How to Fix An RV Fridge If It’s Not Cooling
Tools and equipment needed
Screwdriver, gloves, multi-meter, gas regulator, air pressure gun, and pipe brushes (some of these are optional).
Step 1
Check for ammonia – cooling coils inside can be the cause of the leak in a worst-case scenario – if this happens, then a full replacement of the coolant unit, or the refrigerator itself is likely needed.
Step 2
Check your gas source and electrical source – ensure the gas pressure is correct, the pilot light or flame is burning For the electrical source, check the voltages of the appliance, particularly the heating element and the main circuit board for the RV.
Step 3
Check thermistor and temperature sensors are working – if this component fails, then the negative temperature coefficient will fail, and a replacement will be needed. Temperature sensors can also come loose; check these to ensure they’re fitted securely.
Step 4
Check evaporator fan and diffuser – listen to see if the evaporator fan is spinning, and if not, check to see if anything is inhibiting its movement. If there isn’t, then check the diffuser in the freezer compartment to see if it’s blocked with ice.
Step 5
Check ventilation throughout the system and RV – the upper refrigerator vent, and the RV vent cover, in particular, can be prone to a build-up of dust and impurities causing restriction of airflow, and the refrigerator’s system to overheat.

How to Replace Cooling Unit in RV Refrigerator
Tools and equipment needed
Screwdriver, paint scraper, putty knife, gloves, Thermo-Mastic, camera, and an assistant.
Step 1
- Remove further screws at the front and rear of the refrigerator, which is accessible on the side of the RV, through the vent door.
- Shut off the propane gas supply and disconnect the pipe.
- Turn off the circuit for the RV refrigerator at the mains board removing both power lines from the unit (AC & battery).
- Remove the refrigerator out of its cabinetry.
Step 2
- While the refrigerator is upright, remove the remaining screws holding the unit in place
- Very carefully unscrew and remove the burner assembly from the coolant unit
- Unscrew remaining rear-mounted screws from the coolant unit – ensure you’re extra careful when prying the unit from the evaporator foam; check with the manufacturer to see the best technique for achieving this.
Step 3
- If there’s any remaining thermo-mastic in the sealing joint or cooling fins, scrape it all out.
- Remove all old aluminum tape and clean the surface.
- Check for moisture and dampness in the insulation – if there’s a lot of it present, you MUST wait a few days for this to dry before installing the new unit.
- Take time to carefully align up the new unit for fitting into the evaporator foam pack – if necessary, carefully trim excess evaporator foam to help with the fit.
- Seal cooling fins with a new layer of Thermo-Mastic using a putty knife.
- Run HVAC aluminum tape on the outer areas of the evaporator foam pack, ensuring it has a careful seal with the refrigerator cabinet.
- Seal the exterior joint of the evaporator pocket using low-expansion spray foam
- Use the spray again on the outer edges of the pocket.
- Take time to carefully align, then place the coolant unit into the refrigerated cabinet and place in the first two rear-mounted screws.
- Once the evaporator foam pack is placed back inside, insert the rest of the mounted screws – ensuring the refrigerator is in the upright position.
- Finish taping up the evaporator joint.
Step 4
Now it’s time to test your RV refrigerator.
Reconnect the refrigerator to the AC mains and reconnect the gas pipe and place it back in cabinetry, then screw it back into place – start running the power immediately on the refrigerator and leave for several hours to start the cooling cycles on the new unit.