Uncut Tiny House Realized
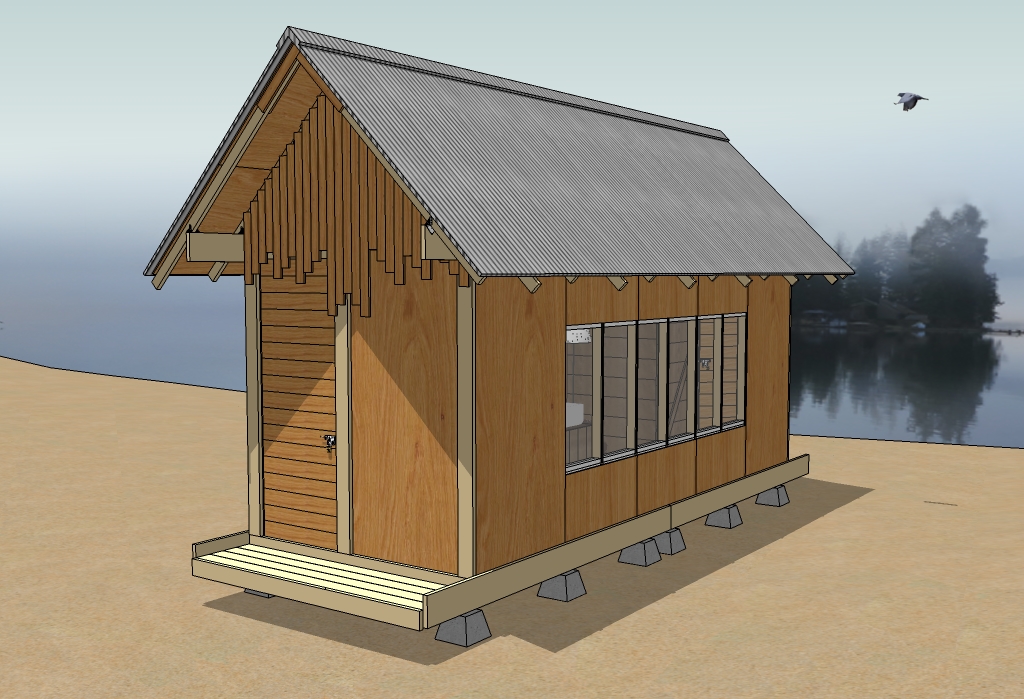
As a result of this exploration we now know that a tiny house that could be built without a saw. The direction I went in is just one way to go too – and I’m certain there are many many more. In fact several folks have commented and contacted me directly suggesting some great improvements. I was thinking of running a little design competition to see how many people we could inspire to jump onto this idea – but this whole process sparked a new idea that’s even better.
You see when you choose to avoid using a saw in your design, you end up making compromises that create another kind of waste – the use excess material in the structure. Making cuts for a perfect fit means the house only ends up with just the right amount of material, albeit with some discarded waste lumber.
So what if we took the learnings from the Uncut Tiny House and applied them to a No Waste Tiny House. In other words, take the benefits of avoiding using a saw and combine that with a few strategic saw cuts that result in pieces that are included in the structure. The house should still go together much like a kit with little sawing and the end result would be no wasted material.
But I digress… Let me show you this version of the Uncut Tiny House. The post that follows this one will be my first pass at a No Waste Tiny House.
Continue to see the assembly process and details.
If you’d like to explore the design in SketchUp, download the Uncut Tiny House SketchUp Drawing (27MB).
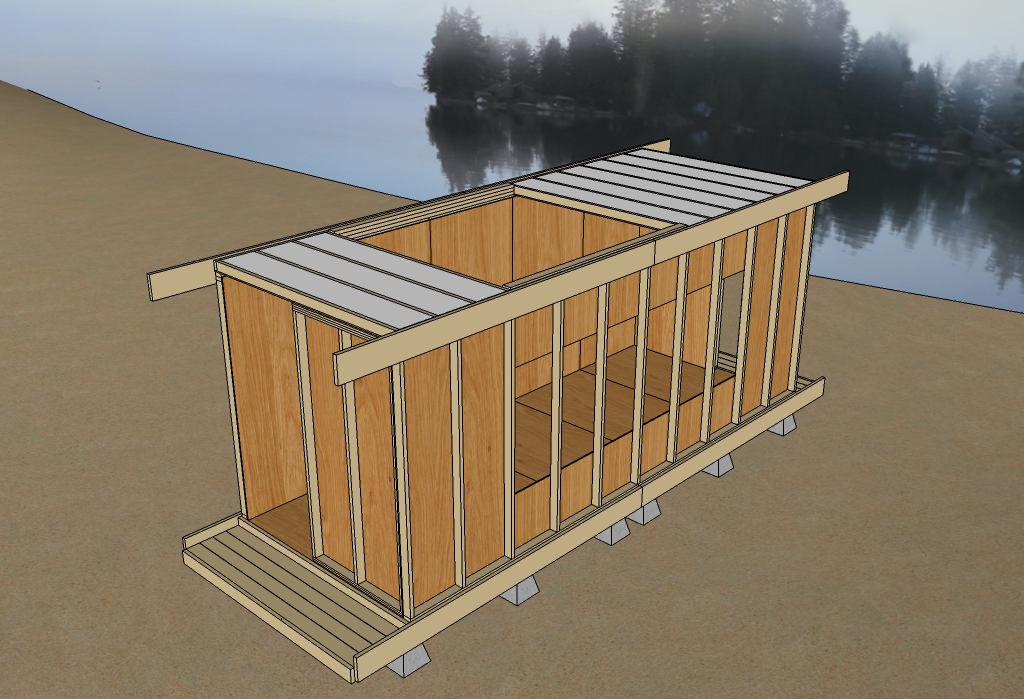
Continue down the page to see how this would be assembled from off-the-shelf building materials.
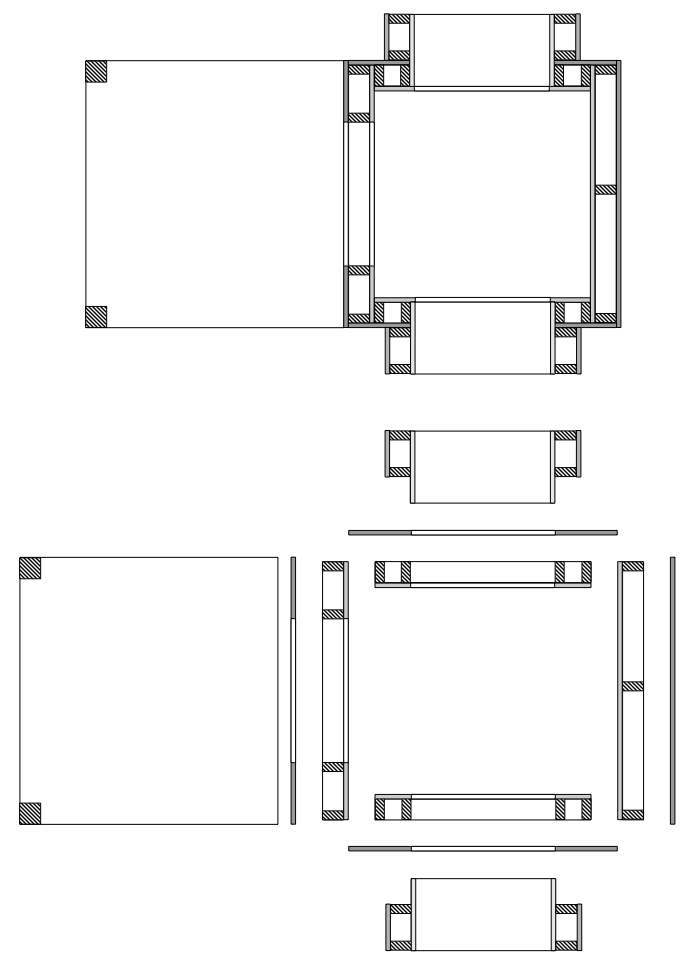
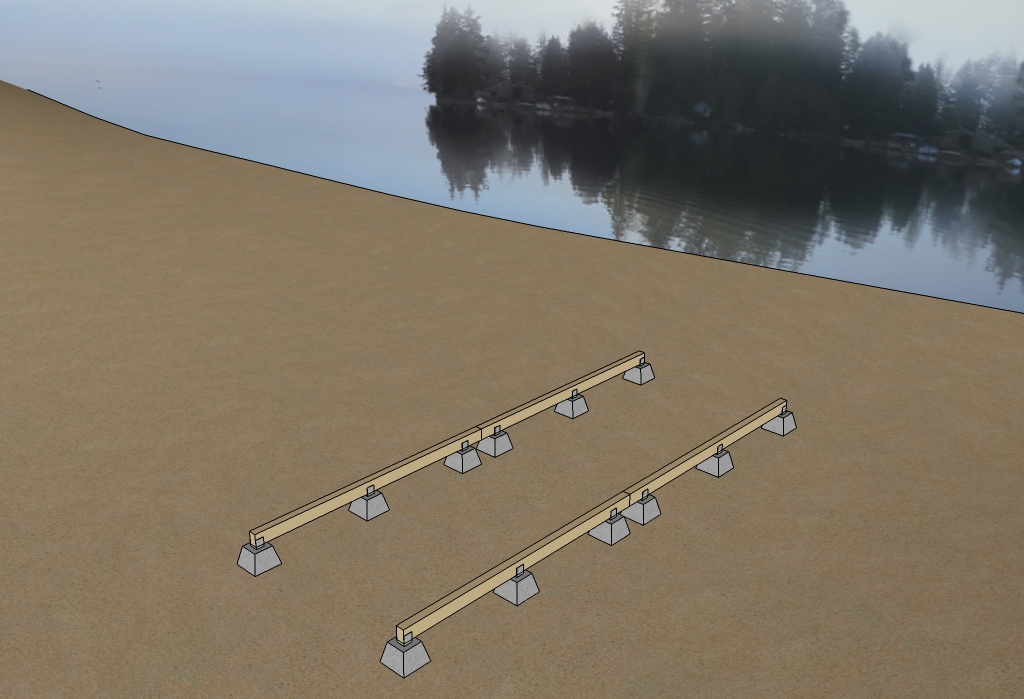
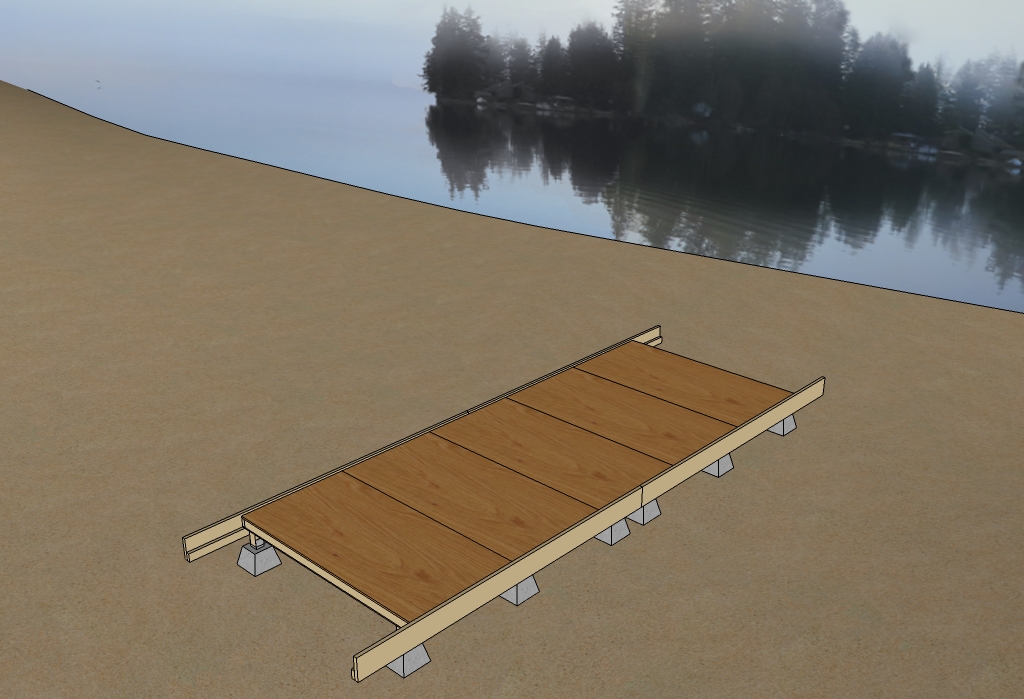
Below: The foundation, 4x6s on piers.
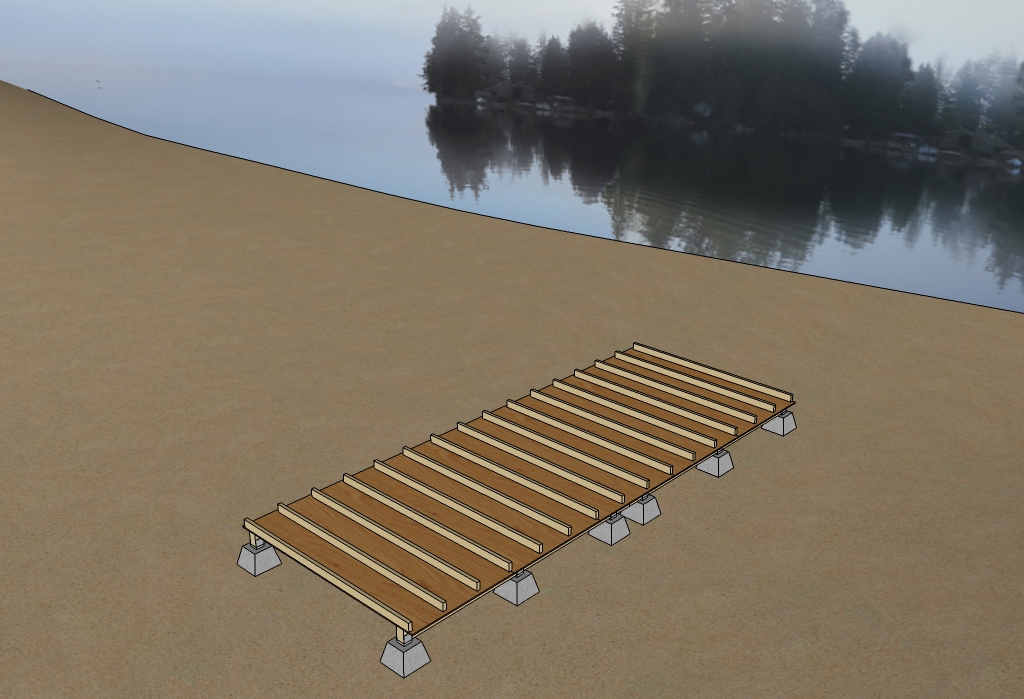
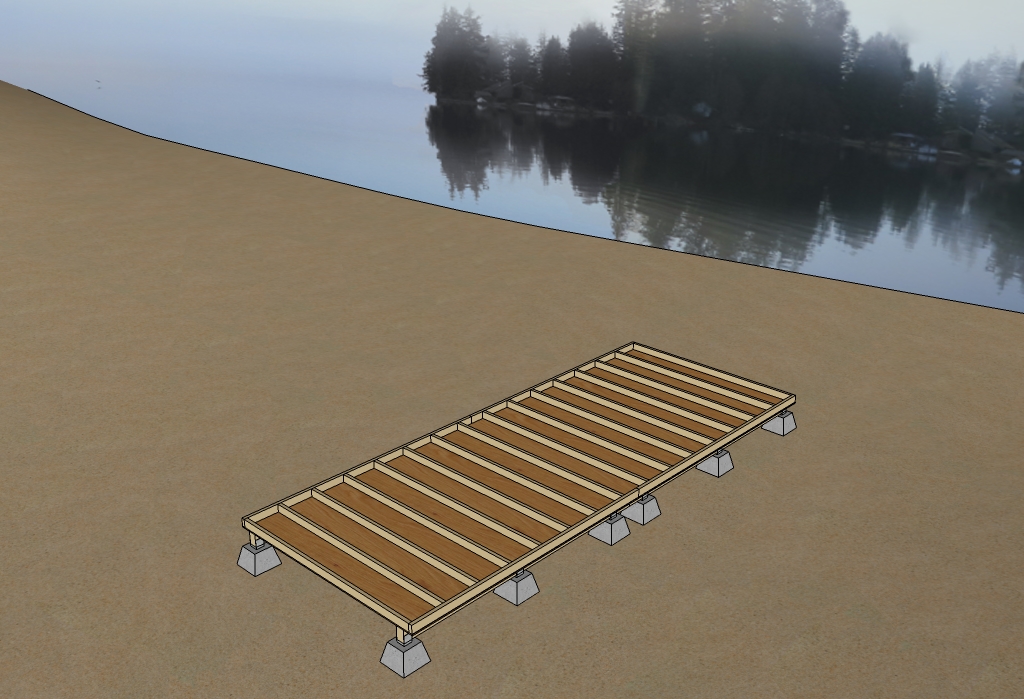
Below: Floor Panels. 4×8 sheets of 1/2″ plywood with stud length (92 5/8) 2x4s at 16″ O.C.
Below: 10-foot 2x4s fastened to 2×4 stud length floor joists.
Below: Floor insulated with foam boards.
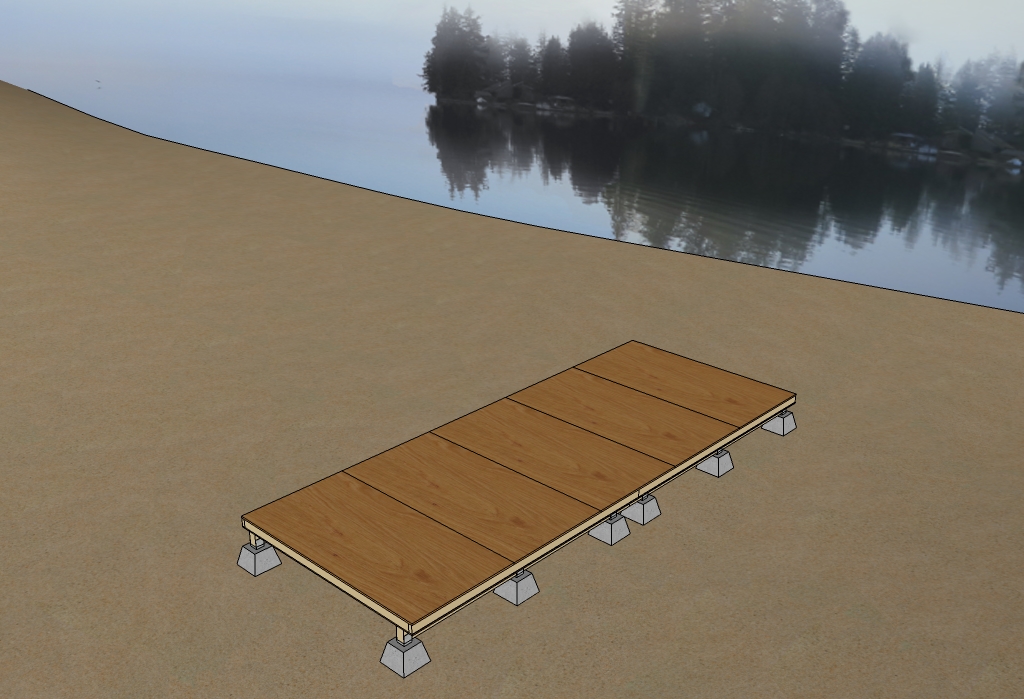
Below: Floor sheathed in 3/4″ plywood.
Below: Edge boards added as trim and support for the decks.
Below: 2×6 deck boards added.
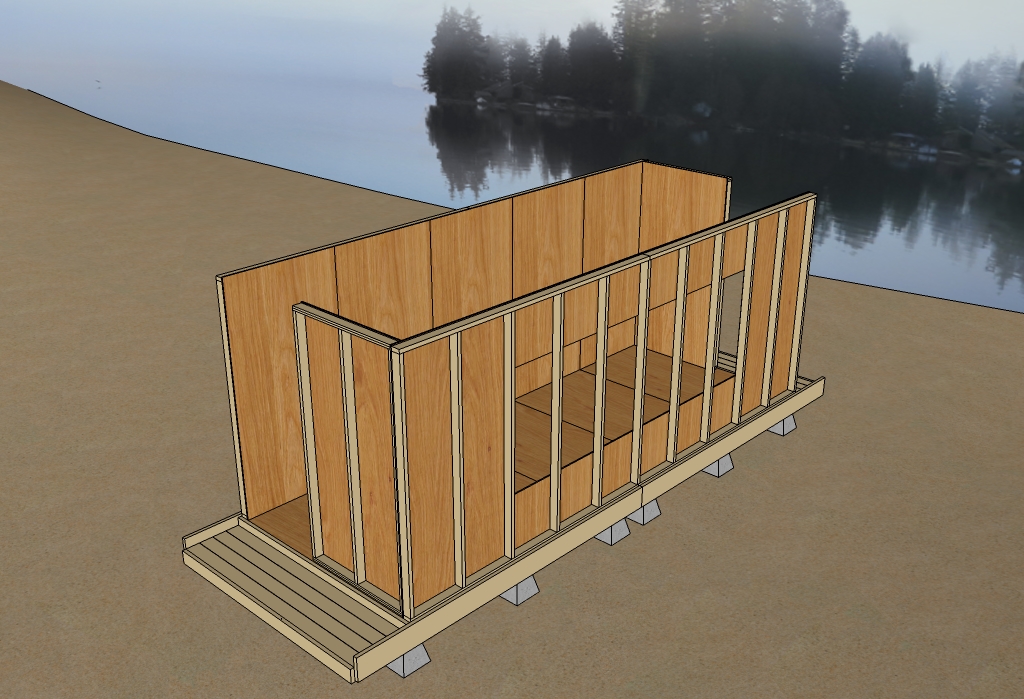
Below: Wall bottom plate nailed to floor.
Below: Detail view of bottom plate. Two 1×4’s (actual .75″ x 3.5″) nailed together to form one 4-foot 2×4 assuming 4-foot 2x4s are not available.
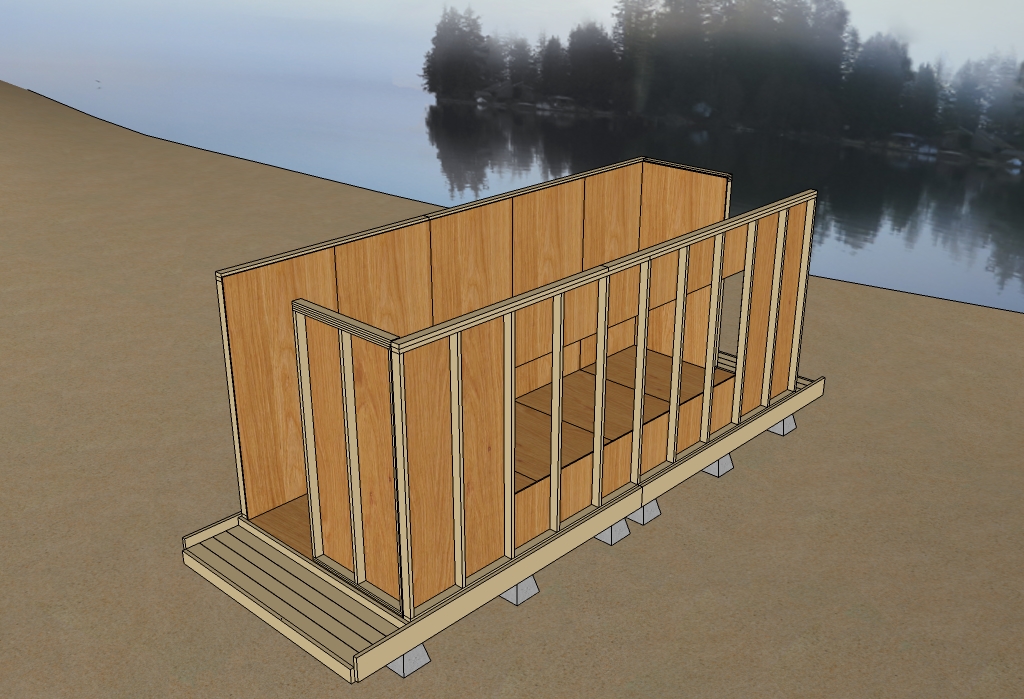
Below: Wall panels added. 1/2″ plywood with stud length 2x4s much like the floor panels. These would need to be toe-nailed to the bottom plate. Alternatively the walls could be framed in a conventional fashion and lifted into place.
Below: Top plate added to walls.
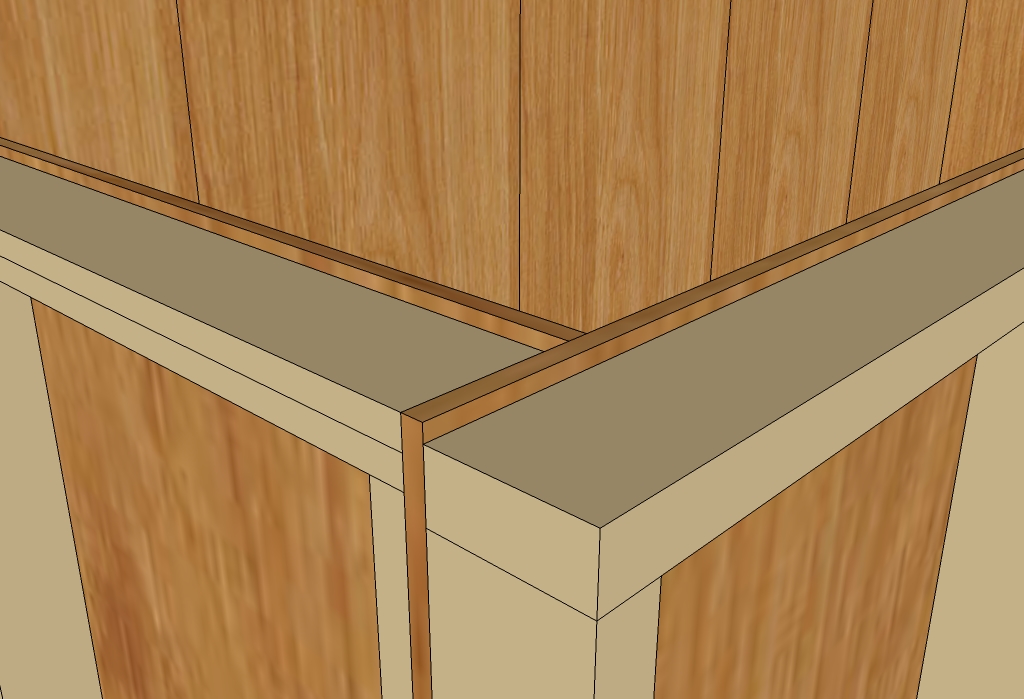
Below: Detailed view of top plate. Notice that by using a stud length 2×4 the total height of the wall is just shy of 8-feet.
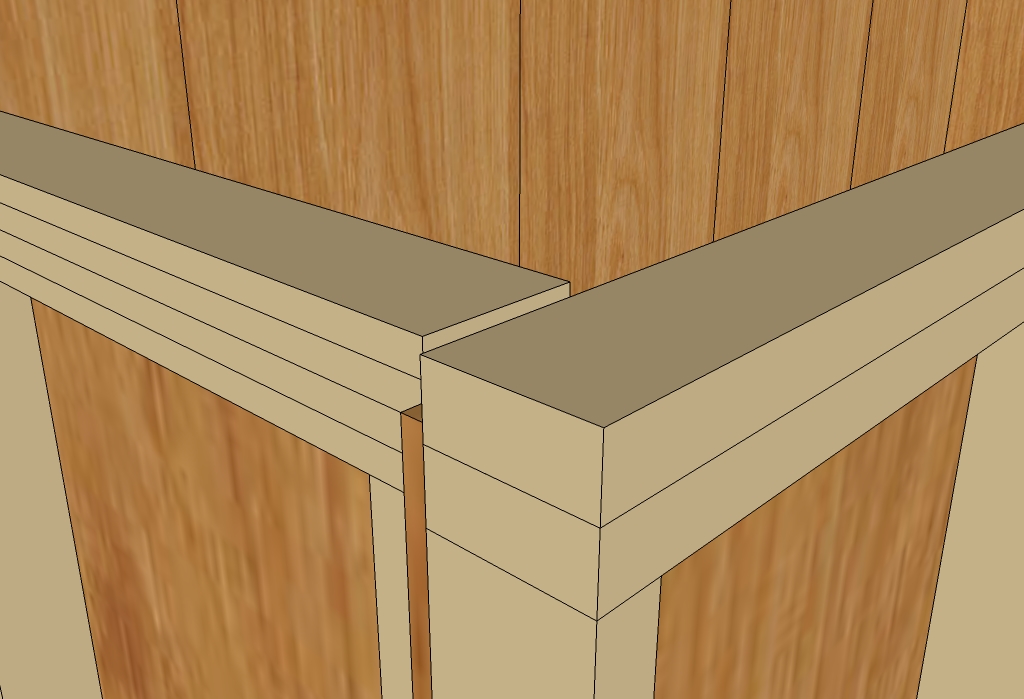
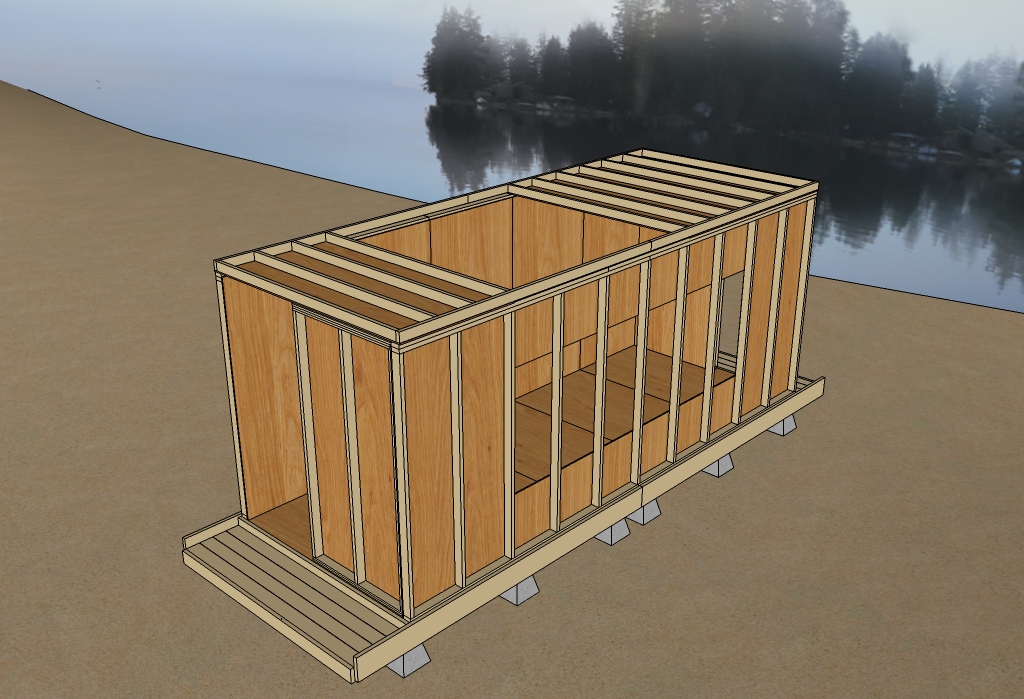
Below: Second top plate added. Notice that the top plates are not overlapped like they should be. This is a compromise as a result of the no saw rule.
Below: View of the structure with the second top plate added.
Below: Ceiling panels added. These are just like the floor panels and help tie the walls together where the lack of overlapping top plates don’t.
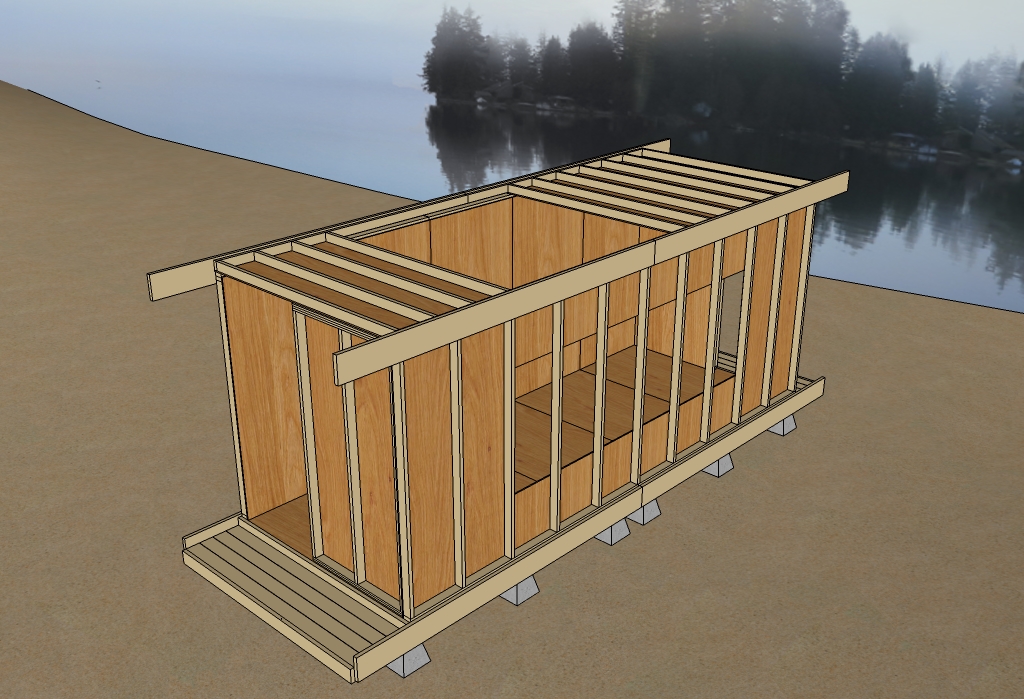
Below: Ceiling panels tied together with edge boards.
Below: 12-foot 2x10s added to help tie everything together and provide a surface for the roof trusses to attach.
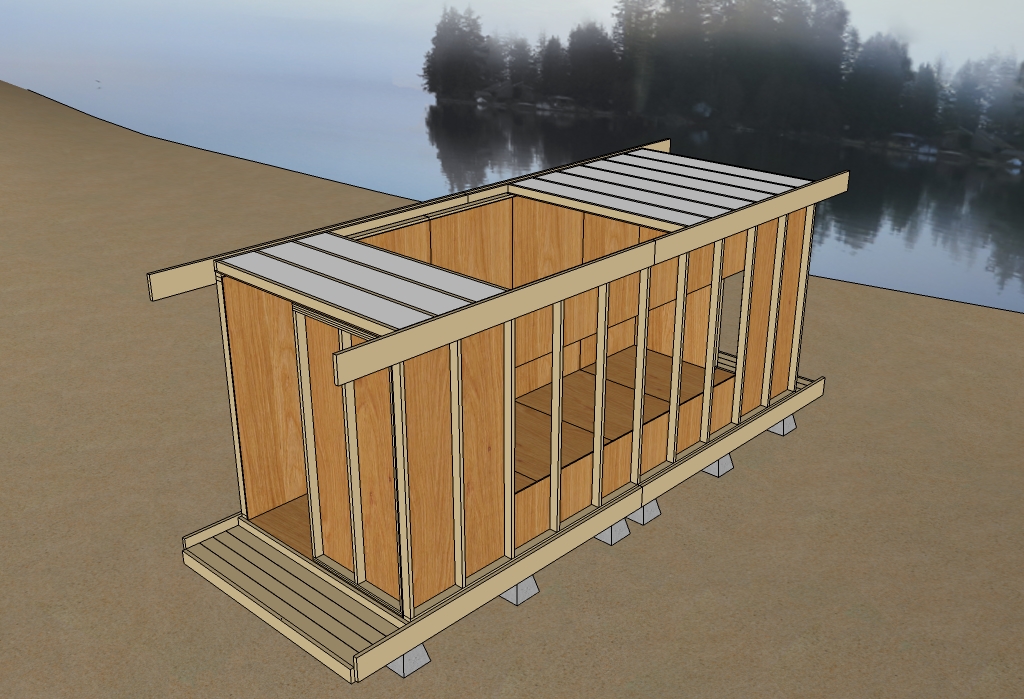
Below: Ceiling insulated. You could skip this unless you chose to finish it with a flat roof (not shown here).
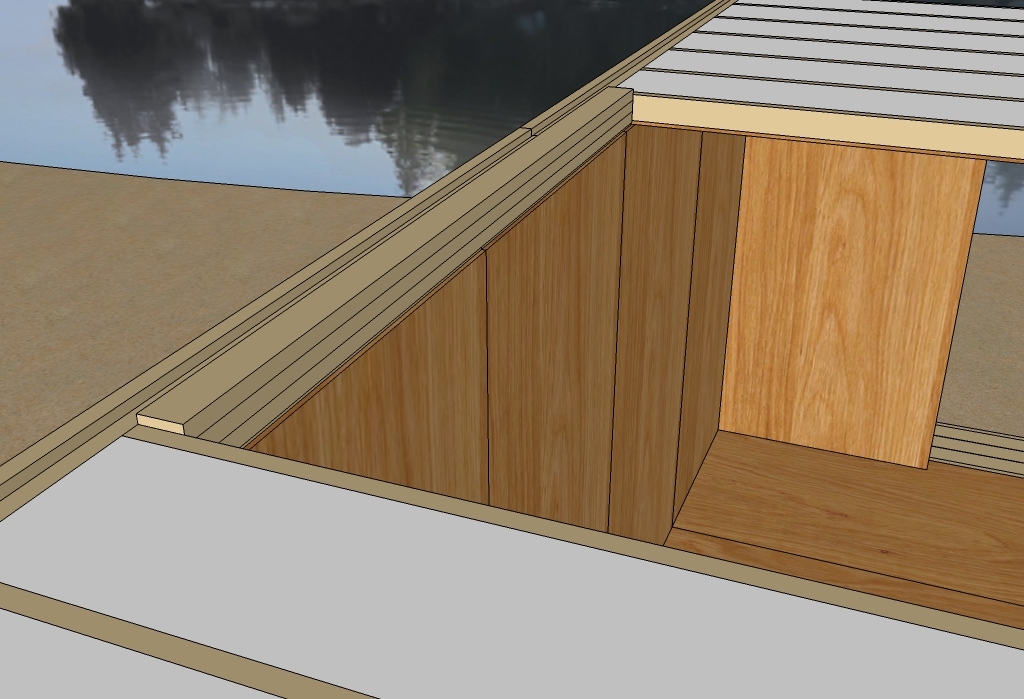
Below: 3 2×6 boards added to fill the gap between the ceiling panels. Again this is a wasteful way to fill this gap caused by the no saw rule.
Below: Detailed view of the gap fillers.
Below: Deck sheathed.
Below: Tie plate added as another surface to attach the roof trusses.
Below: Walls insulated. This step could have been done earlier.
Below: Walls sheathed.
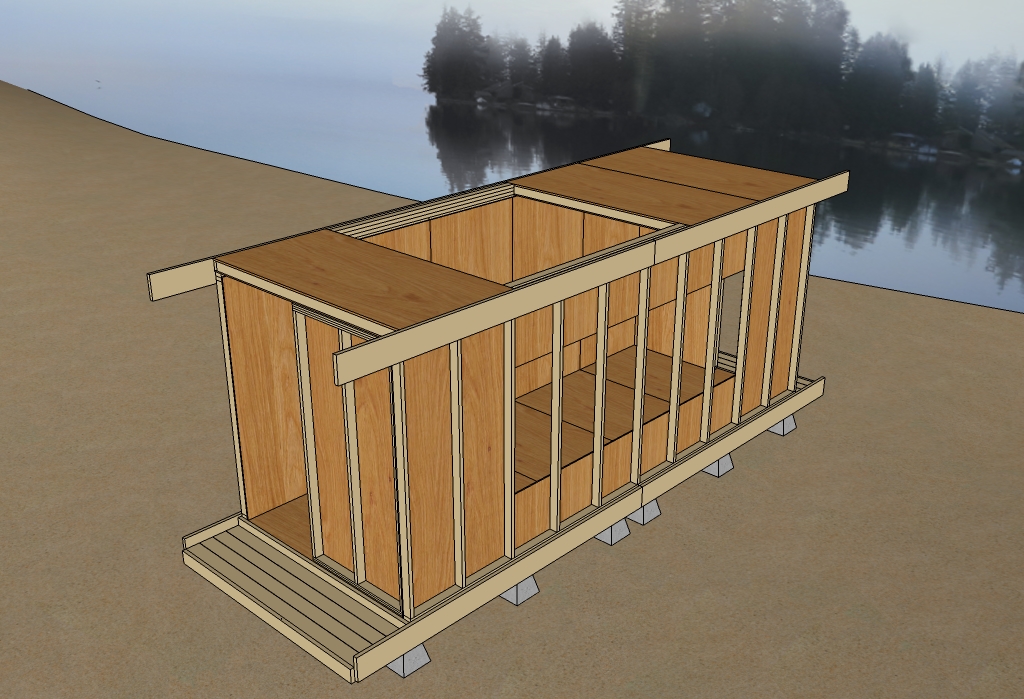
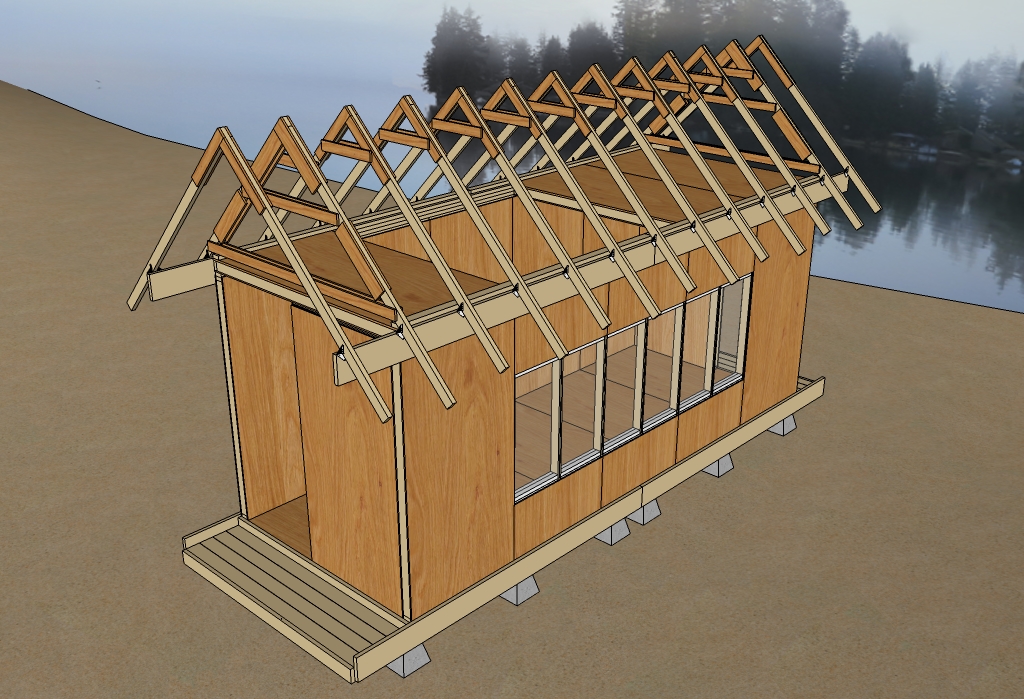
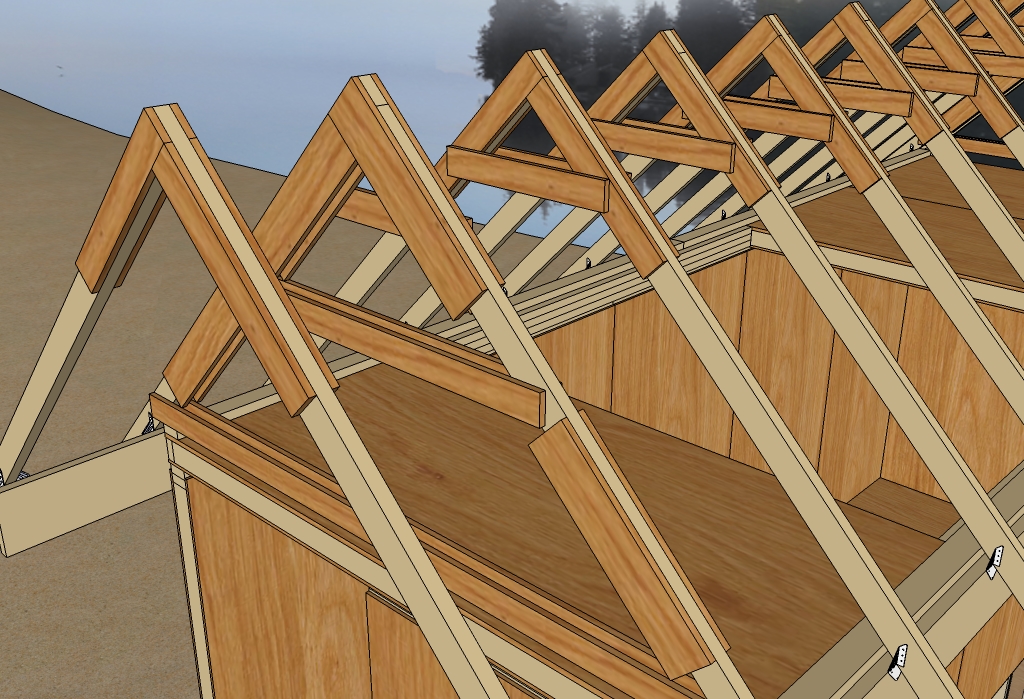
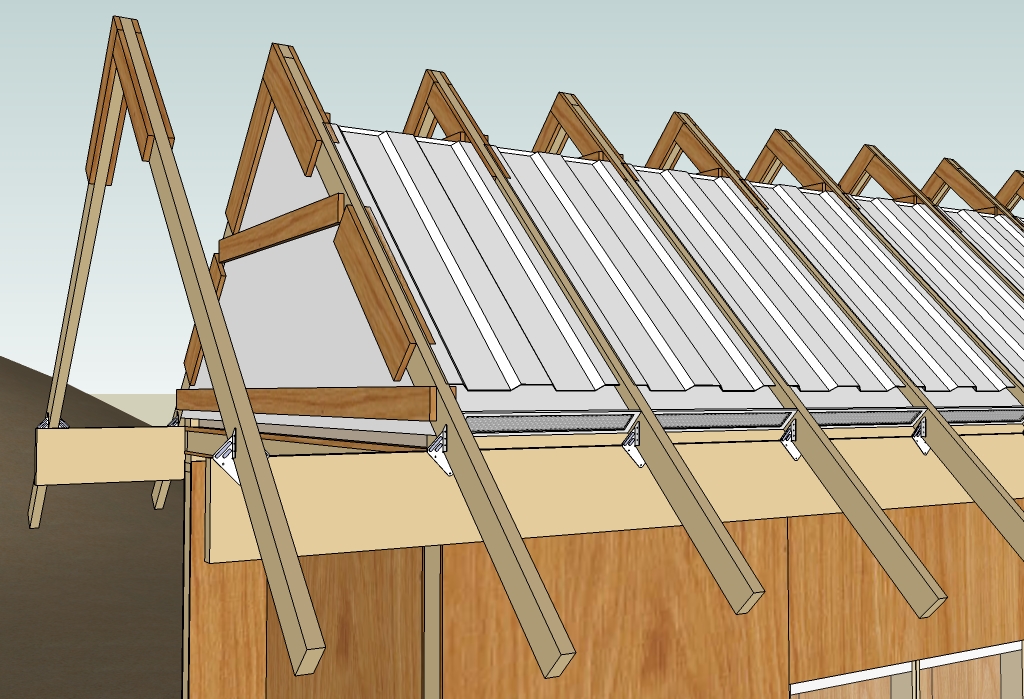
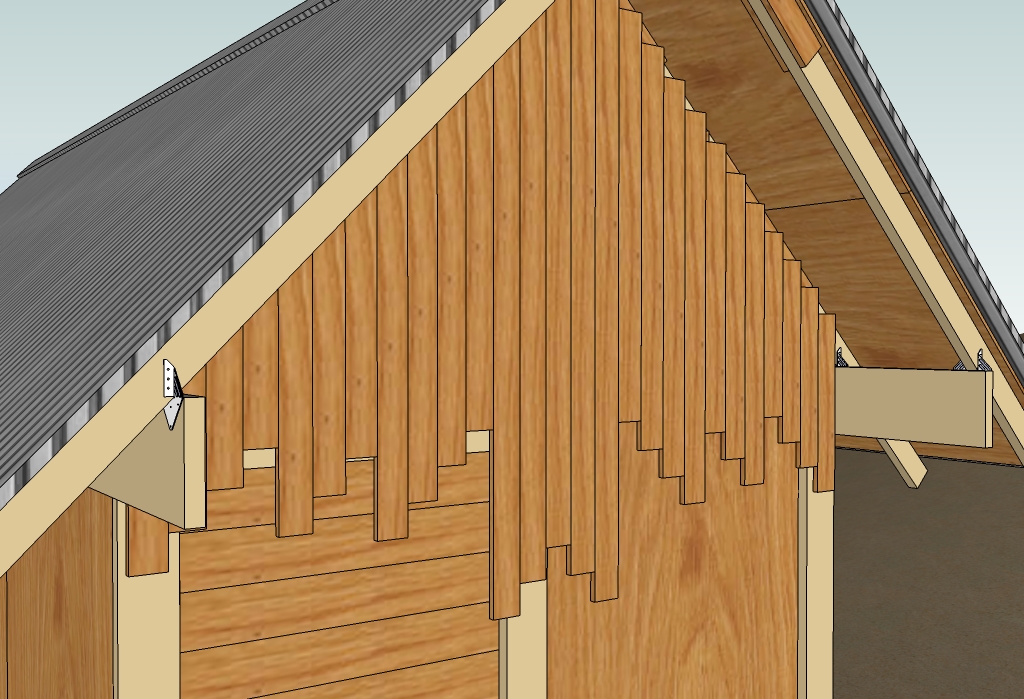
BelowRoof trusses made on the ground and lifted onto the roof. They are ties together with 1×4 material. At the gables extra 1x material is added to provide nailing surfaces for the interior ceiling drywall and exterior boards.
Below: Detailed view of trusses.
Below: Drywall installed before exterior roofing to show how the roof is layered… you’d probably want to build the next few steps in the reverse order.
Below: Roof insulated.
Below: Rafter vents and soffit vents added.
Below: Detail view of rafter and soffit vents.
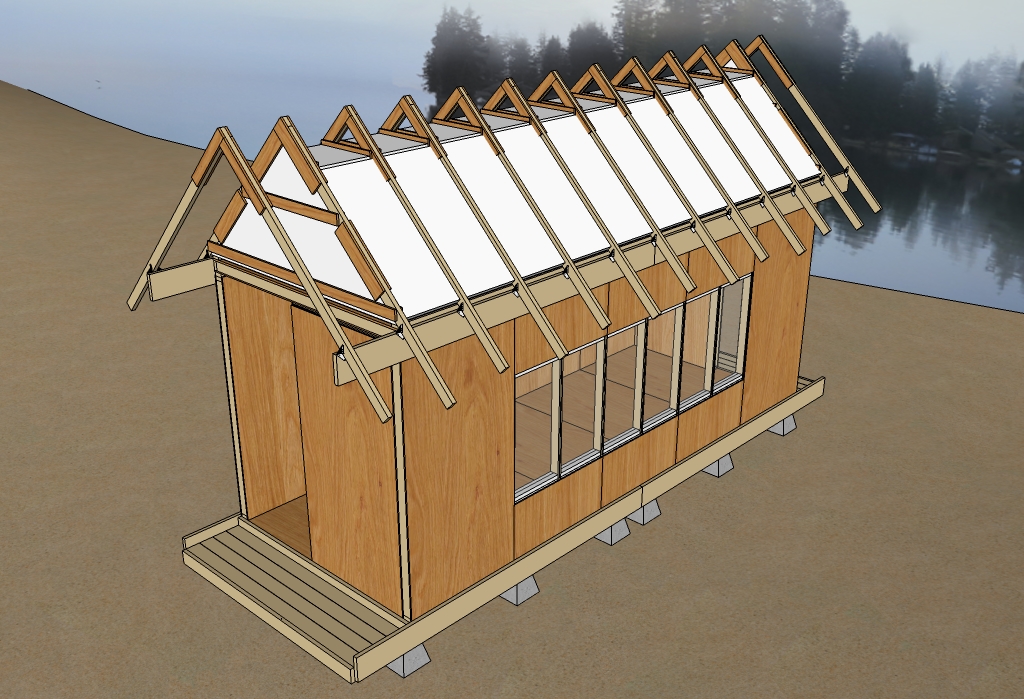
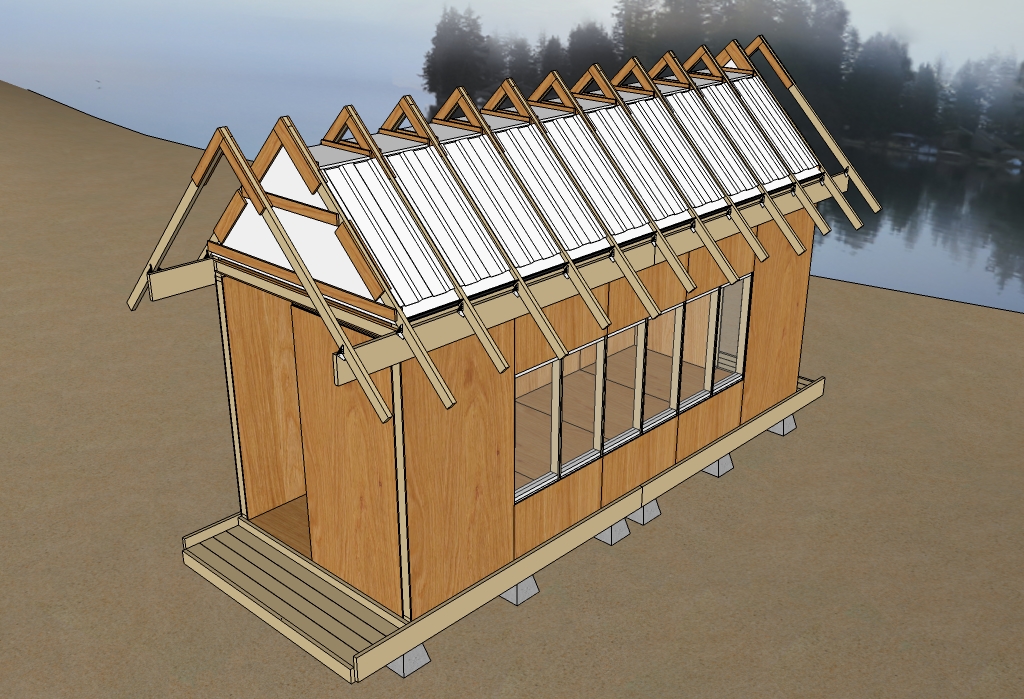
Below: Roof sheathed.
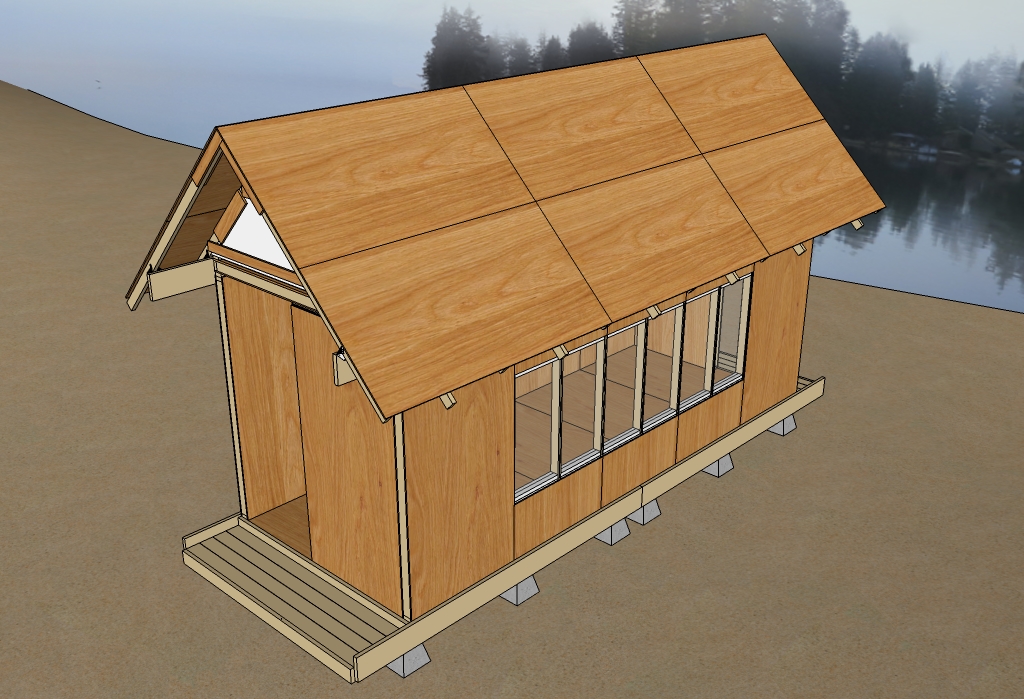
Below: Roofing installed.
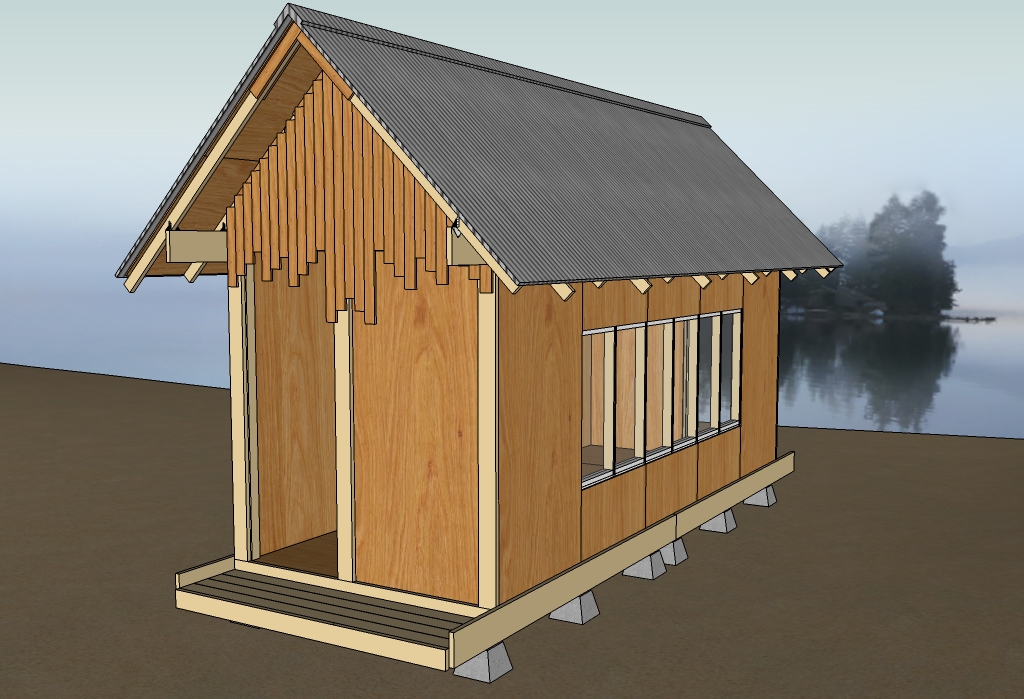
Below: Gables sheathed with 1×4 wood boards. 2,3,4 and 6-foot boards are used and look staggered due to the no cut rule. Another example of waste created by the no saw rule.
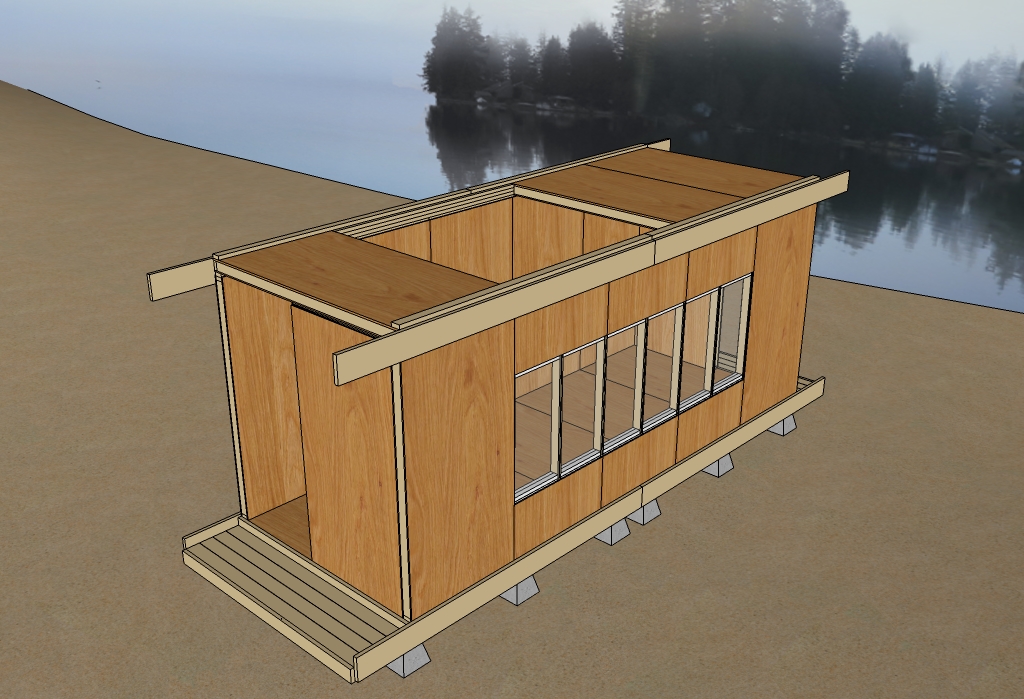
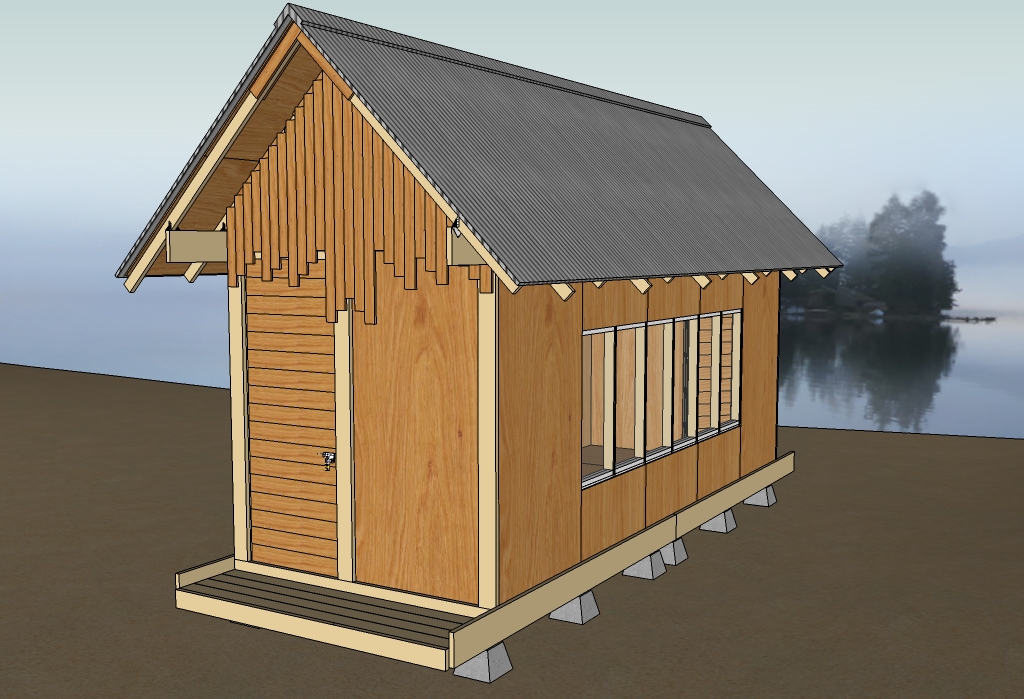
Below: Doors installed. They open inward now. 1×4 material used in the jamb and 1×6 on the doors. The core of the door is foam with two 8-foot 2x4s holding it all together.
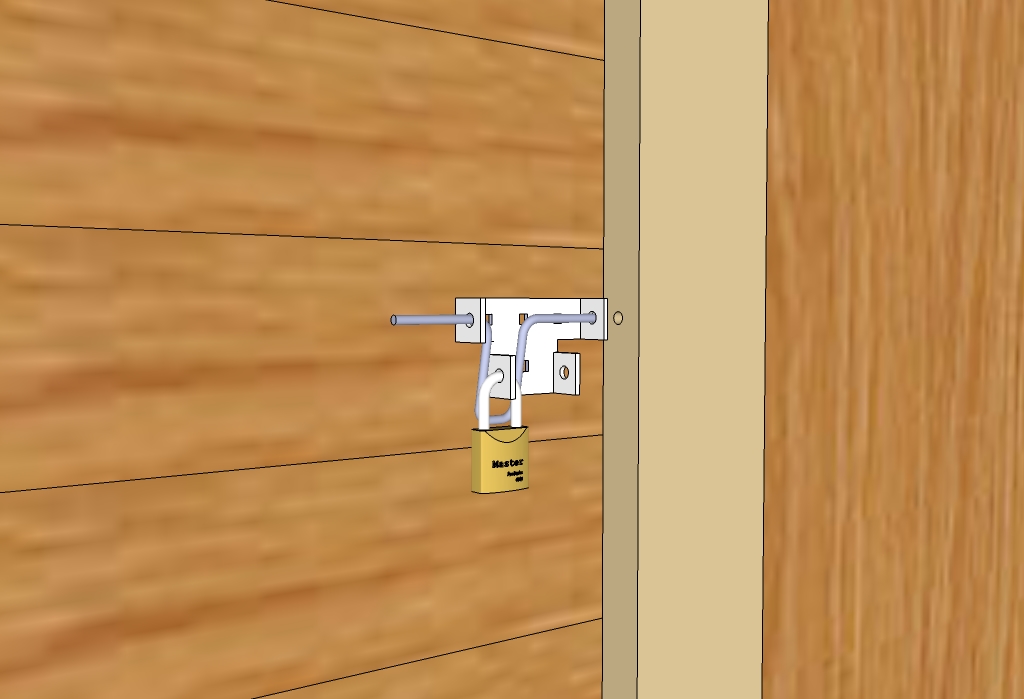
Below: Latch used since a hole saw is a saw and no saws are used 🙂
Below: Detailed view of the gable.
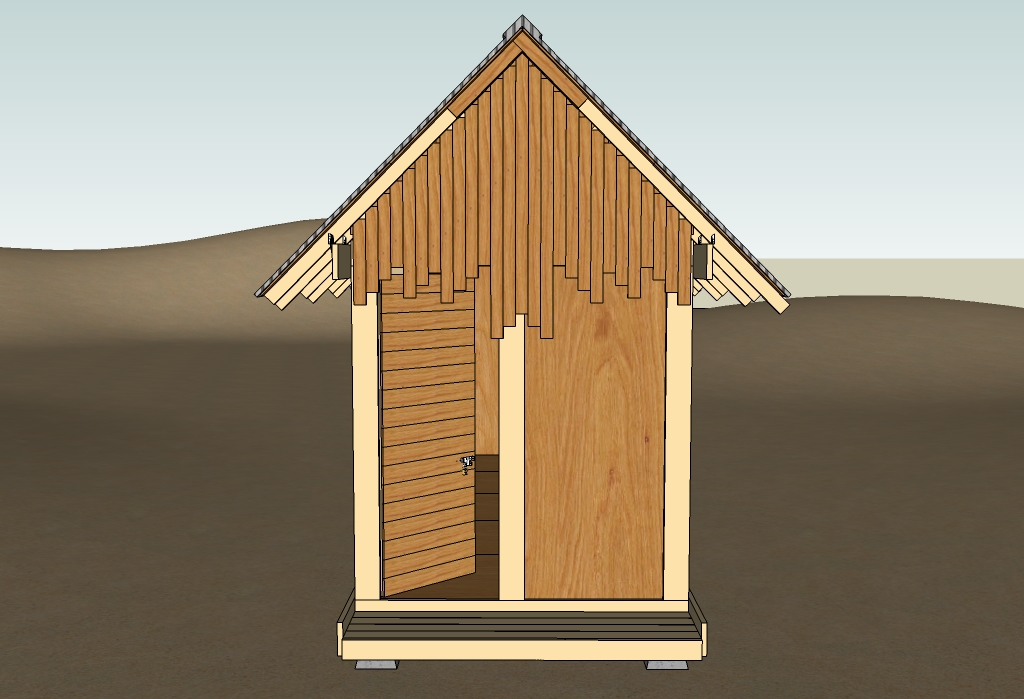
Below: Rear facade.
Below: Interior view toward back.
Below: Interior view toward front.

Could it be easily modified to be 8×12? Or would that be to difficult?
Yes! In fact when I draw up the plans I’ll include an 8×12 for those that want to stay under the 120 sqft limit for permit-free ‘sheds’ and this 8×20 to stay under the 200 sqft limit (found in some areas). I’ll also include the flat and pitched roof. I never found a good way to do a shed roof.
Michael, I am planning a service project for a group of teens. I’m looking at building a 8X12 tiny house on a skid foundation (3 a 6X6X12 skids). Our plan is to use this tiny house as a temporary housing for homeless individuals, so we are looking at simple, sturdy and easy to maintain. My current interior layout includes a wet bath, kitchenette, built-in dining/study area, a small closet and a twin bed which doubles as a couch. We are planning on the 12 foot side to have the entry door.
I would be very interested in seeing your 8X12 flat roof plans as we hope to add solar panels up top. Do you have an expected timeframe?
The plans for the Uncut Tiny House should ready in about a week. The No Waste Tiny House about a week after that (guessing).
You should also check out this free plan for an 8×12 tiny house. https://tinyhousedesign.com/8×12-tiny-house-free-plans/
Thanks!
AWESOME!!! I have no explaination why but smaller appeals to me more than larger. I can’t wait to see the finished plans! E T A?
Let me second Richfrog’s first comment, Michael!
Agreed re wastefulness. 🙂
Does the permit for 8×12 sheds apply to the maximum exterior wall dimensions?
The inside decks and windows are NEAT!
Construction should be a snap, especially if one makes use of those nifty brackets to connect all sorts of lumber. Which, btw, should reduce the waste on the trusses quite a bit. For example, those plates with all the sharp points sticking out that one simply hammers onto the the 2 pieces to be connected.
Last question: How do you support the middle of the front & back porch deck-boards? I’ve done 4 feet on a swimming pool deck, but never more.
Again, NEAT!
Scott
I love that this whole project could be hauled to a remote location and built without a power supply. I have tiny vintage trailers 8′, 10′, 13′ and 15′. I am thinking about housing them individually in something like this. How would I adapt a gravel pad for the floor? Love your idea!
I absolutely love this process!!! My hubby and I are actively downsizing our lives – we’ve gone from 1300 sq. ft. to 800 sq. ft. The next step is to buy some land and start construction on our own small house.
This process you’ve laid out is really good, and your generosity in sharing the details even better. Thank you so much and I’ll be actively watching this page for more info and sharing!
What would be a rounded estimate on the cost of materials?
Any update on the plans for the uncut tiny house?
Great fun. But, as you know,
“In theory, practice and theory are the same.
In practice, they’re not”.
A few years messing with lumber as delivered will warn you against expecting an 8 footer to give you 8 good feet of wood. You may not use saws to trim your insulation to fit between your ceiling members, but you do cut. The collar beams in your trusses are horribly compromised by being uncut; draw a big scale diagram of the collar beam ends, consider the grain of collar beam and rafter, place dots for where the nails will go. How do you feel about that connection now?
Good luck,
Mussa
My father, Raymond Barnhart, designed a panellised system very similar to this concept 40 or so years ago. Yours is a nice presentation for a do- it -yourselfer. This can be accomplished in an even simpler manner, and provide any number of designs and layouts. The possibilities. are endless!